WEAVEBIRD HELP
SENSORS TESTING
|
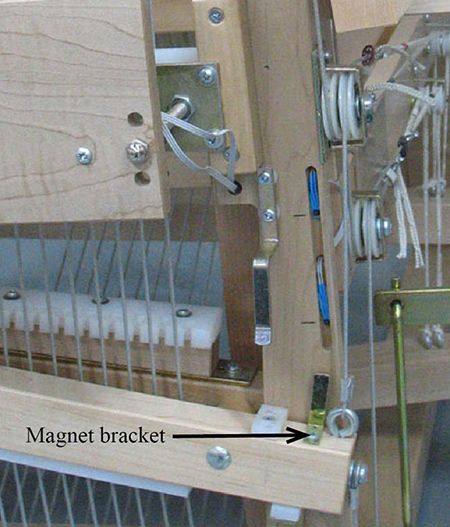
See: PROBLEM WITH THE SOLENOIDS NOT MOVING BACK AND OR THE PATTERN NOT SWITCHING WHEN THE SHED CLOSES. 1) Push down the right treadle in order to completely open both arms 2) Unscrew the magnet bracket 3) Note that the magnet which is probably glued to the bracket has a small red dot. This indicates the right side which will face the sensors. 4) Take both sensors out of the groove. Save the Handi-Tak 5) Start the software and power the Interface box. 6) Start a plain weave pattern. As soon as the first series of the solenoids is activated, take the magnet bracket in your hand and pass it in front of each sensor until the solenoids move back. 7) Pass the magnet in front of the other sensor. Note: approximately 1 minute after the solenoid selection is made, the solenoids will move back by themselves to avoid overheating. If the complete sequence works, re-install the sensors in the groove (at the black marks) and the magnet to its original place. Any problems at any stage of this instruction have to be reported to info@leclerclooms.com with the complete explanation referring to this instruction steps. Feb/11/2009 version
|